Currently comes in Lime, Car Paint, and Glass.DancemasterGlenn wrote:What flavor?gllt wrote:I made jello in 3DS max but I can't get the materials right :V
You have such good skills
Snes controller progress:
-
grinvader
- ZSNES Shake Shake Prinny
- Posts: 5632
- Joined: Wed Jul 28, 2004 4:15 pm
- Location: PAL50, dood !
Hmmm lime jell-o. I am reminded an excellent story.
Anyway... back ontopic; unexpected issues came up but were solved using my trusted steed, Feet.
Without further ado... I'm gonna edit the thumbnails in one by one, as they get uploaded.
Ok, let's set it up. The showgirl had a nasty case of leprosy, so I went and did a little cleanup. Lots of dirt still stuck here and there, but heh.
Innards shot.

Yeah, as you can see, the same casing was usable for both US and EU pads (see 'lavender/purple').
Time to close her up, ladies. Wire, please.

The picture quality slowly improves as I get the hang of it and I tried a variety of light sources/angles.
Feel free to ask for more pictures if needed, the previous issue I had won't happen again.
Little pause on the left boobie, err, the right one. It was on the left because you rebuild the pad from the backside.

This pad has the 'invisible' shoulder button labels, i.e. the letters are flat-surfaced but not coloured.
On the visible version (that I also have), the surface is unchanged (slightly grainy) but the letter is coloured in.
Left one...

Stupid imageshack reduced the resolution on that one. I'll eventually make an archive with all the full res pics, anyway.
Bite its shiny plastic backplate.

Mmmm, curvy.
Let's give the lady some clothes...

... and a slight tap on the ass.

Just peachy.
Or is it ??

DEAR LORD WHAT THE HELL
We probably forgot some major structural element on the way. Pump'er another dose of sleeping potion and gimme that rusty scalpel back. Bitch.
Whew. I was wondering why I had that left out. There it goes.

The painkillers should stop acting now, so let's hurry a bit.
Hmm... might as well take a last one from the front. Never know when blackmail can come in handy.

It seems she got operated by Frankenstein. My keen surgeon senses detect a knee to the gut several years old, so hard it cracked the board and cut the circuit line for the start button, infuriating the user further.
(Homemade fix with aluminium sheet and insulant tape. Woo.)
All right, let's see if the stiches held.

Enough cord length for turtle style bondage !
A full frontal shot. Love the camera, rawr.

The buttons show the wear and tear of years of abuse and savage fingering, but they were silky smooth and flat-surfaced in her prime.
Time for a new position. You like it that way, right ?

Show off those buttons of yours, baby.
Turning around to get a nice view on the dpad's shape...

Oops, nasty crack in the jaw there. Nothing to see here, there were no charges kept against me.
DO A BARREL ROLL !

Press A to shoot.
Close up on the rubbers. We promote safety first.

Do note the very legible font.
Time for the money shot. Make sure not to miss a single detail.

Oh yeah, this is good.
And for a final, yet important point:

SHAKE SHAKE !
Also note the backside is sloped and the frontside is roughly convex, making the shoulder button side much thicker than the other.
皆黙って俺について来い!!
Pantheon: Gideon Zhi | CaitSith2 | Nach | kode54
Code: Select all
<jmr> bsnes has the most accurate wiki page but it takes forever to load (or something)-
DancemasterGlenn
- Veteran
- Posts: 637
- Joined: Sat Apr 21, 2007 8:05 pm
-
Verdauga Greeneyes
- Regular
- Posts: 347
- Joined: Tue Mar 07, 2006 10:32 am
- Location: The Netherlands
-
byuu
You will after this post :PI feel dirty.
You dirty little girl ...Lots of dirt still stuck here and there, but heh.
Yes, you naughty little controller. Take your top off.
Yeah, that's more like it. Now turn around.
That's better ... now where's your younger sister at ... ?

Yeah, now we're talking ...
-
FirebrandX
- Trooper
- Posts: 376
- Joined: Tue Apr 19, 2005 11:08 pm
- Location: DFW area, TX USA
- Contact:
Thanks a bunch for those pics! The money shot was especially revealing, and I also knew ahead of time about the slight convex shape of the front casing. All of these elements will go into the final model, and I am seriously considering a complete model job on each piece so that the entire controller can be assembled in virtual reality. Doing so will significanty increase man-hours spent on the project, so it will have to be my 2nd hobby away from chess while I work on it. I will prioritize the casing so we can get exterior shots first.
I'v got a digital camera with tripod that does excellent zoom-focus detail shots, so when my new controller arrives in the mail, I'll be doing what's called "forensic photography". The is where each part is photographed at the exact same distance from the fixed lense, allowing me to use the photos as grid overlays in 3DS Max. I'll be using a level and clamps so I can photograph each piece's side profile in addition to the front and back sides. For now though, your photos are great for giving me time to plan how to tackle each piece. For one, I can see my bump-mapping was a little too fine in some areas where the bumps are larger on the real thing. Excellent info!
Info that was kind of shocking is how dirty your girl is. She needs a wash, bro! I'd have taken Q-tips and rubbing alcohol to that whore!
Anyway, the controller I won off ebay is in virtually new condition, so I can't wait to strip it down to parts and get to snapping. It will serve as a good cross-reference to yours so I can physically inspect the parts myself.
NES NTSC palette file:
http://www.firebrandx.com/downloads/fbx2pal.zip
http://www.firebrandx.com/downloads/fbx2pal.zip
-
byuu
I already love the controller render! Any chance at getting the mouse / SS / Justifiers? :D
The last one probably just needs a color change, maybe an extra cord out the bottom if you want to be really fancy.
Would be awesome to get them into v040 (probably out in April sometime), but of course I mean no pressure. We can use the controller-only like v039 and earlier if need be.
The last one probably just needs a color change, maybe an extra cord out the bottom if you want to be really fancy.
Would be awesome to get them into v040 (probably out in April sometime), but of course I mean no pressure. We can use the controller-only like v039 and earlier if need be.
-
FirebrandX
- Trooper
- Posts: 376
- Joined: Tue Apr 19, 2005 11:08 pm
- Location: DFW area, TX USA
- Contact:
I'm sure I could whip the mouse out, but the SS is a major undertaking from the screenpics I've reviewed of it. I actually had one many years ago when it was new, but I had since forgotten all the fancy trim it had.
I fully intend to do one, but I'm sort of obsessing over the controller for now. If I stop to work on other pojects before finishing, I'm likely to get lazy and blow something off. That happened with my lego renders, where I had done several technic bricks, then got sidetracked and lost my enthusiasm.
I fully intend to do one, but I'm sort of obsessing over the controller for now. If I stop to work on other pojects before finishing, I'm likely to get lazy and blow something off. That happened with my lego renders, where I had done several technic bricks, then got sidetracked and lost my enthusiasm.
Last edited by FirebrandX on Sat Feb 21, 2009 2:59 am, edited 1 time in total.
NES NTSC palette file:
http://www.firebrandx.com/downloads/fbx2pal.zip
http://www.firebrandx.com/downloads/fbx2pal.zip
-
grinvader
- ZSNES Shake Shake Prinny
- Posts: 5632
- Joined: Wed Jul 28, 2004 4:15 pm
- Location: PAL50, dood !
Unaltered collection of pics - http://www.mediafire.com/download.php?gqnubj4jy5o
皆黙って俺について来い!!
Pantheon: Gideon Zhi | CaitSith2 | Nach | kode54
Code: Select all
<jmr> bsnes has the most accurate wiki page but it takes forever to load (or something)I realise it's too late now, but I just came across this site with vector-art for nearly every Nintendo logo ever.FirebrandX wrote:Updated the image. Now ALL the face fonts have been redone to exactly match the real controller.
-
FirebrandX
- Trooper
- Posts: 376
- Joined: Tue Apr 19, 2005 11:08 pm
- Location: DFW area, TX USA
- Contact:
Actually that's incredibly useful! I was hand-rendering my best approximation of the fonts, but with that PDF, I can at least redo the SNES logo to exact specifications! Thanks!Thristian wrote:I realise it's too late now, but I just came across this site with vector-art for nearly every Nintendo logo ever.FirebrandX wrote:Updated the image. Now ALL the face fonts have been redone to exactly match the real controller.
Edit: actually after applying it, I found it was too sharp. By imitating the tiny imperfections in the paint applied to a real controller, my old version looks more realistic than using the perfect vector version. I'm still holding onto those pdfs, because they may come it useful at some point.
NES NTSC palette file:
http://www.firebrandx.com/downloads/fbx2pal.zip
http://www.firebrandx.com/downloads/fbx2pal.zip
-
FirebrandX
- Trooper
- Posts: 376
- Joined: Tue Apr 19, 2005 11:08 pm
- Location: DFW area, TX USA
- Contact:
I finished my cover contracts and got back to work on the controller. I used Grin's photos to make a series of improvements today:
1. Redesigned the crosspad to have accurate arrows and a concave slope. The slope angle is programmable, so I can make it more or less intense. For the arrows, I made a mirror-symmetrical overlay from the closeup of Grin's crosspad. He made a lucky shot of the crosspad itself that was 99.9% perfectly square, which helped me quite a bit in getting the scale properly done. About the only thing I still need to work on for the crosspiece is rounding the corners more deeply.
2. Adjusted several of the colors and specular highlights based on Grin's photos.
3. Adjusted some of the bump-mapping params.
4. Adjusted the heights of all the buttons to be more accurate.
5. As per kick's suggestion, I redesigned the middle button slots with a slight convex slope.
BTW here's a shrunken image of the overlay I made from Grin's photo:

The cross hairs I added in for alignment while I was using it as a guide in the rendering program.
That's all for today. I'll pick back up again tomorrow.
1. Redesigned the crosspad to have accurate arrows and a concave slope. The slope angle is programmable, so I can make it more or less intense. For the arrows, I made a mirror-symmetrical overlay from the closeup of Grin's crosspad. He made a lucky shot of the crosspad itself that was 99.9% perfectly square, which helped me quite a bit in getting the scale properly done. About the only thing I still need to work on for the crosspiece is rounding the corners more deeply.
2. Adjusted several of the colors and specular highlights based on Grin's photos.
3. Adjusted some of the bump-mapping params.
4. Adjusted the heights of all the buttons to be more accurate.
5. As per kick's suggestion, I redesigned the middle button slots with a slight convex slope.
BTW here's a shrunken image of the overlay I made from Grin's photo:
The cross hairs I added in for alignment while I was using it as a guide in the rendering program.
That's all for today. I'll pick back up again tomorrow.
NES NTSC palette file:
http://www.firebrandx.com/downloads/fbx2pal.zip
http://www.firebrandx.com/downloads/fbx2pal.zip
-
grinvader
- ZSNES Shake Shake Prinny
- Posts: 5632
- Joined: Wed Jul 28, 2004 4:15 pm
- Location: PAL50, dood !
There's probably a word for stuff like this, but it's too badass to let itself be written down.
皆黙って俺について来い!!
Pantheon: Gideon Zhi | CaitSith2 | Nach | kode54
Code: Select all
<jmr> bsnes has the most accurate wiki page but it takes forever to load (or something)-
FirebrandX
- Trooper
- Posts: 376
- Joined: Tue Apr 19, 2005 11:08 pm
- Location: DFW area, TX USA
- Contact:
Ha ha, thanks guys. I'm still a bit nitpicky on a few things though. I think maybe I used too much filleting on the middle button bevels. I will probably tighten that up just a hair tomorrow while I work on rounding the corners of the crosspiece.
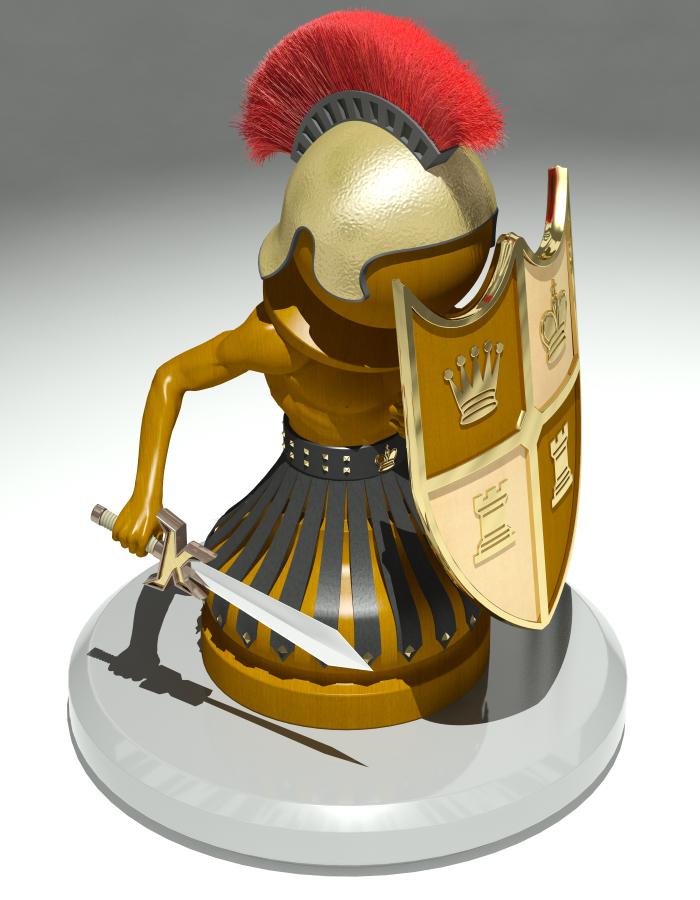
BTW, sorry for the long absense from work on this. I was sent a rush-order contract and had to work 12-hour shifts the past week. I took the time to work on improving previous models I made as well. Check out my little battle pawn with all-new brass metallics I applied:
http://www.firebrandx.com/downloads/battlepawnhres.jpg
I made him a couple years back, but I never was quite happy with him at the time. Adding in new brass and re-styling his helm brush has helped improve his look I think.
NES NTSC palette file:
http://www.firebrandx.com/downloads/fbx2pal.zip
http://www.firebrandx.com/downloads/fbx2pal.zip
Something looks strange now, the dpad and buttons look like they're being shown at completely different angles even though the controller is laying perfectly flat.
http://img16.imageshack.us/my.php?image=pict0019ct3.jpg
You were probably looking at this up-close camera shot. This is a distortion of reality caused by the curvature of the lens.
http://img16.imageshack.us/my.php?image=pict0019ct3.jpg
You were probably looking at this up-close camera shot. This is a distortion of reality caused by the curvature of the lens.
-
FirebrandX
- Trooper
- Posts: 376
- Joined: Tue Apr 19, 2005 11:08 pm
- Location: DFW area, TX USA
- Contact:
I wasn't probably looking at anything, homey. The crosspiece now has a concave slope to it, and the button heights have been adjusted to be more accurate. They are not at "completely different angles". That is just the perspective skewing, which I can control from the viewport.
Edit: I uploaded a new image using 30 degrees instead of the default 45 degrees. I hope that's what was bothering you.
Edit: I uploaded a new image using 30 degrees instead of the default 45 degrees. I hope that's what was bothering you.
NES NTSC palette file:
http://www.firebrandx.com/downloads/fbx2pal.zip
http://www.firebrandx.com/downloads/fbx2pal.zip
-
FirebrandX
- Trooper
- Posts: 376
- Joined: Tue Apr 19, 2005 11:08 pm
- Location: DFW area, TX USA
- Contact:
-
FirebrandX
- Trooper
- Posts: 376
- Joined: Tue Apr 19, 2005 11:08 pm
- Location: DFW area, TX USA
- Contact:
-
Verdauga Greeneyes
- Regular
- Posts: 347
- Joined: Tue Mar 07, 2006 10:32 am
- Location: The Netherlands
I think this looks better too.. doesn't the brain make eyes work like a flat lens? (sort of.. you know what I mean) I don't think we're trying to capture what a picture of a controller looks like, we're trying to capture how it looks to us. (of course, correct me if I'm wrong) It does look pretty flat dead-on - could you show it from a slight angle with a flat lens?
Awesome, much better. If you want to make the buttons look more 3d to the brain at this angle, I recommend playing with the lighting to make them show a reflection of some kind... the reflections can make the tops look concave even at a straight-on angle. Notice how the light bends around the mound at different intensities in the second pic.


Last edited by FitzRoy on Sun Mar 01, 2009 11:16 pm, edited 1 time in total.
-
FirebrandX
- Trooper
- Posts: 376
- Joined: Tue Apr 19, 2005 11:08 pm
- Location: DFW area, TX USA
- Contact: